Creating Backup DVD Video Discs
This walk-through describes the steps involved in making
a backup copy of a video DVD. You should only make backup
copies of discs you own.
When copying a video disc it is more economical to use
single layer DVDs. The problem is commercial DVDs usually
hold more information than can fit on a single layer DVD.
So in order to copy a movie onto a single layer blank DVD
disc the video files must first be compressed. The goal
is to preserve as much of the movie and extras and still
produce a high quality backup copy.
This walk-through describes an example of making a backup
copy of a commercial DVD. There are many options available
using the programs described as well as other programs that
perform similar functions. The
Doom9 website is the
definitive DVD backup resource. Check them out or read the
documentation for the individual programs if you want to
delve deeper. But If you only want to know the basics
on how to make a copy this walk-through should be all you
need.
There are 3 steps to making a copy:
- Rip -
Copy the original files to your
hard drive
- Compress -
Shrink the files to fit on a single
disc
- Burn -
Write the compressed files to
a blank disc
Hardware and Media
- DVD Writer Drive (multi format recommended)
- DVD Reader Drive (optional - allows single pass
copying)
- DVD-R or DVD+R blank discs
Installing the Software
There are 3 software programs you need to download or
purchase and install:
DVD Decrypter and DVD Shrink are free programs (donations
encouraged). Nero is about $99 retail but OEM versions are
available for much less.
Insert the original disk in your DVD drive and start
DVD Decrypter. It will read the disc and display the files.
Make sure all files are selected.
You will need to specify where the copied files will
be stored on your hard drive. DVD Decrypter will choose
a name for you. In the example below it chose the directory
name DVD_VIDEO located on the C: drive. The name
is less important than knowing where the files are - since
you will need to open them during the Shrink step.
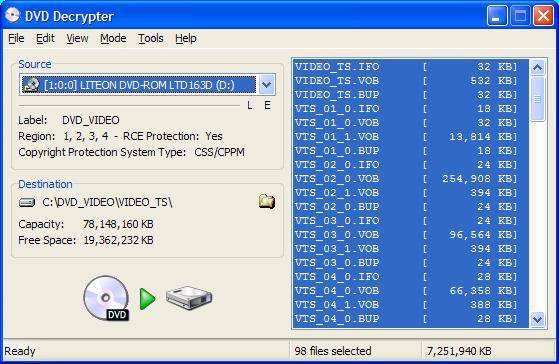
Note that the total size of all the files is 7.2 Gigabytes.
This is almost twice as much as will fit on a single layer
DVD.
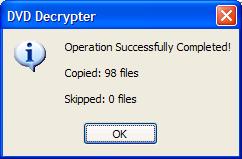
Copy the files by clicking the green play button (a sideways
triangle) at the bottom of the DVD Decrypter window.
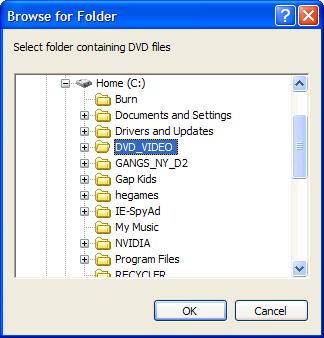
Start the DVD Shrink program. Click the Open Files button
and select the directory name where DVD Decrypter wrote
the original files.
DVD Shrink will load and analyze all files used on the
disc.

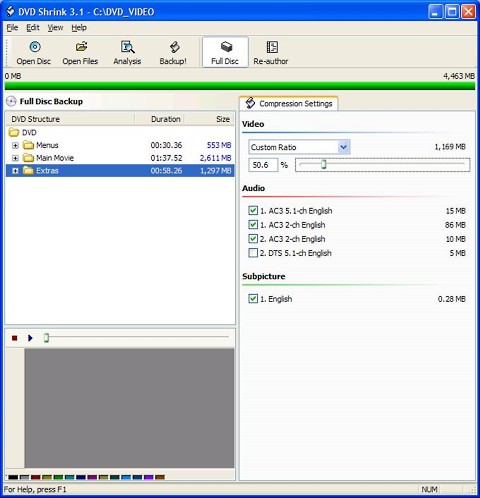
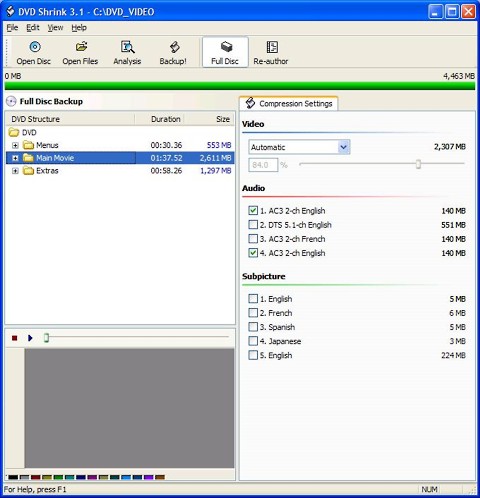
When finished the contents of the disc are displayed.
DVD Shrink will automatically choose compression ratios
that will fit all the content on a single layer disc. If
the ratio is high enough (75% or higher) then you can accept
the default settings and write the files. In this example
however the ratio is 53.7%. This would result in a poor
quality copy. Instead of accepting the automatic compression
settings we will manually set the compression for certain
parts of the disc and eliminate features we don't intend
on using. Here are the automatic settings.

The main movie has an automatic compression of 53.7%.
We want that to be much higher. Note that there are several
audio tracks and subtitles used. These can be unselected
to give more room for the main movie. Be careful when deselecting
English soundtracks as these can contain commentary tracks.
Since most extras are only viewed once, these can be compressed
much more than the main movie and still be watchable. We
changed the compression from automatic to a manual setting
of 50.6 and deselected the DTS soundtrack. The results for
the extras are shown below.
Now we return to the main movie and deselect the DTS
soundtrack and foreign subtitles. The main movie now has
a compression ration of 84% - very good quality. We are
ready to write the compressed files to the hard drive.
Click the Backup button and specify the location for
the compressed files. I recommend choosing a location in
the original directory. This makes cleanup easy once you
are done - you simply delete the original directory.

If you have Nero installed, DVD shrink will write the
compressed files to your hard drive and then start Nero
and burn the final disc. In case you want to manually use
Nero, here is how you do it.
Run the Nero Smart Start program, choose DVD for the
medium and select Burn DVD-Video Files
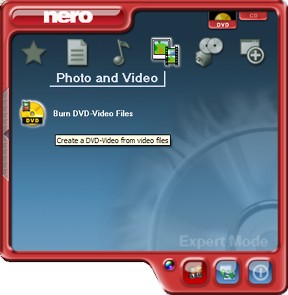
Nero will start up with the folders required for a video
DVD. We are only concerned with the VIDEO_TS directory.
Double click the VIDEO_TS folder icon to open it.
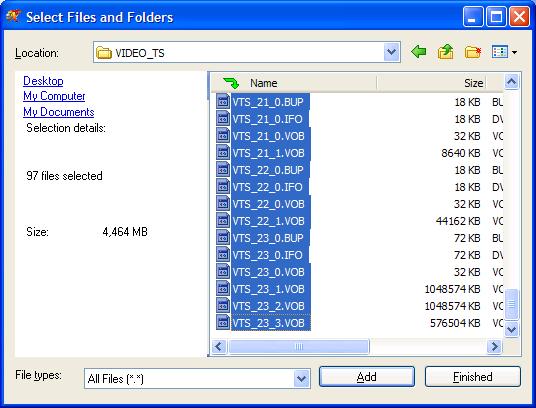
Click the Add button and browse to the VIDEO_TS folder inside
the folder you specified when writing the compressed files.
For this example that is the path C:\DVD_VIDEO\dvd\VIDEO_TS.
Select all the files and click the Add button. Click Finish
to close the Select Files and Folders dialog.
Click the Next Button. Make sure your DVD writer drive
is selected and a blank DVD is in the drive. Click the burn
button to write the finished DVD.
When complete test it out in your DVD player. Use a soft
tip Sharpie felt pen to label the disc or use a CD label
kit.
|